After saving packets with tcpdump, you can read and inspect them later using the -r option. This is helpful when analyzing traffic after a capture session or working offline without needing a live interface.
The captured file is usually in .pcap format, which works with both tcpdump and graphical tools like Wireshark.
Read with -r Option
Use the -r flag followed by the filename to read a capture:
tcpdump -r capture.pcapThis reads and prints the packets in human-readable form.

Combine with Other Options
Even while reading a file, you can still use options like:
tcpdump -r capture.pcap -nn -tt port 53This disables name resolution and shows detailed timestamps. Additionally, it shows the packets where the destination/source port is 53.
Add Useful Display Options
You can combine -r with other options to control how the packets are shown:
| Option | Description |
|---|---|
-q | Quick and quiet: brief info per packet |
-e | Show MAC addresses (Ethernet headers) |
-A | Print packet content as ASCII text |
-xx | Show raw data in hex (no ASCII) |
-X | Show data in both hex and ASCII together |
Example:
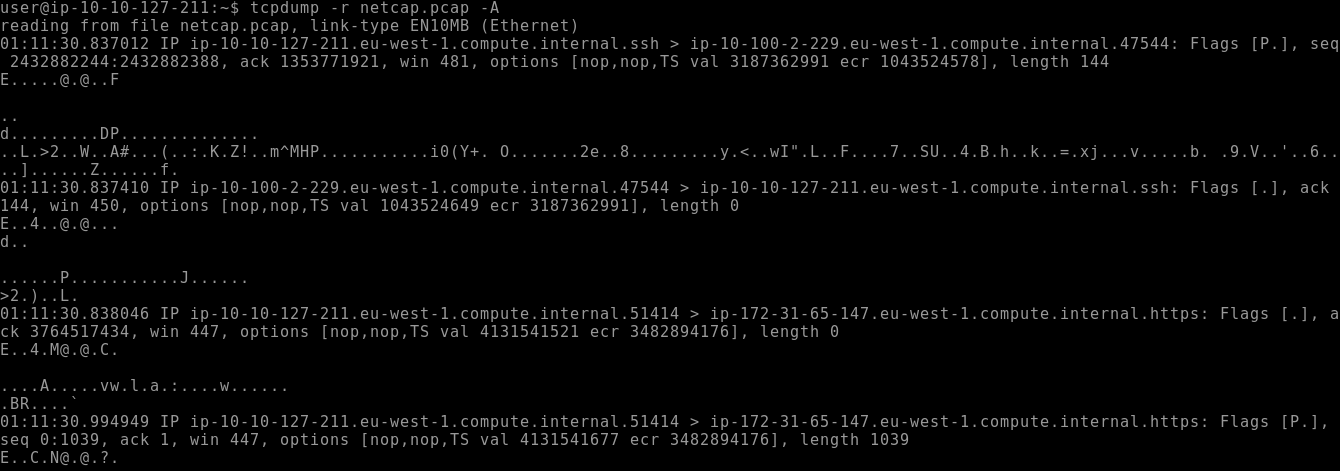
This prints the content of each packet as readable text — useful for inspecting protocols like HTTP:
tcpdump -r capture.pcap -A
This prints the content of each packet briefly:
tcpdump -r netcap.pcap -q

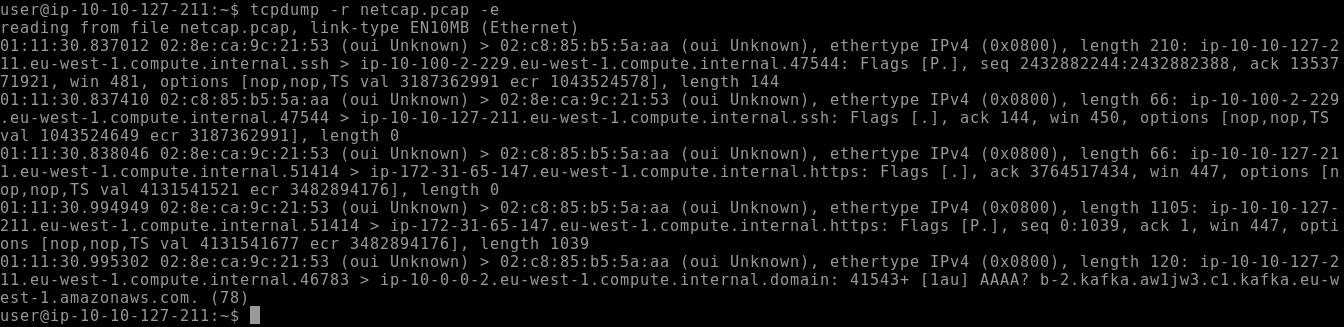
This prints the layer 2 information on each packet, so you can see things such as source/destination MAC addresses:
tcpdump -r netcap.pcap -e